# 1. 前言
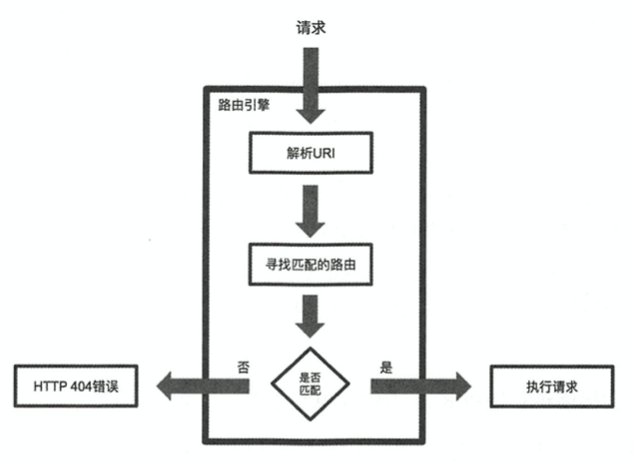
Routing (also known as request routing or URL dispatching) is mapping URLs to code that handles them(中文意思:路由(请求路由或 URL 分发)是匹配 URL 到相应处理程序的活动)。
通俗的说,路由是根据 URL 的变更重新渲染页面的过程。早期,这个过程由服务端实现:当用户进行页面切换时,由浏览器向服务器发送不同的 URL 请求,经服务器解析后向浏览器返回不同的数据,再由浏览器渲染成新的页面。也可以理解为在客户端请求和后端服务器交互的接口中,通过不同的路径来请求不同的网络资源。
# 2. 初识路由
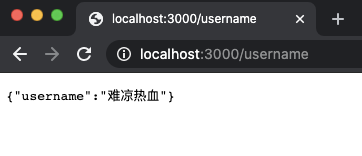
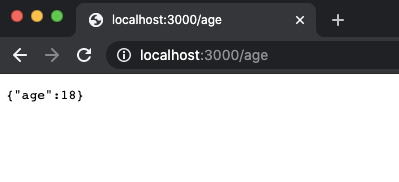
通过前言我们知道,在当下的前后端分离开发模式中,服务端路由就是通过请求不同的路径获取不同的网络资源。例如,我们有这样的需求:当请求 /username 时,获取用户的用户名;当请求 /age 时,获取用户的年龄。那么我们可以写出如下代码:
import * as Koa from "koa";
const app = new Koa();

app.use(async (ctx: Koa.Context, next: Koa.Next) => {
  if (ctx.path === "/username") {
    ctx.body = {
      username: "难凉热血",
    };
  } else {
    await next();
  }
});

app.use(async (ctx: Koa.Context, next: Koa.Next) => {
  if (ctx.path === "/age") {
    ctx.body = {
      age: 18,
    };
  } else {
    await next();
  }
});

app.listen("3000", () => {
  console.log("server is running at http://localhost:3000");
});
2
3
4
5
6
7
8
9
10
11
12
13
14
15
16
17
18
19
20
21
22
23
24
25
26
把上述代码复制并覆盖到 app.ts 中,然后保存并打开浏览器中分别访问 http://localhost:3000/username、http://localhost:3000/age就能看到相应的返回数据了。
这样的写法能够处理简单的应用,但是,一旦要处理的 URL 多起来的话就会显得特别笨重。所以我们可以借助 koa-router 来更简单的实现这一功能。 下面来介绍一下如何正确的使用 koa-router。
# 3. 安装 koa-router
koa-router 具有丰富的 API ,可以实现命名参数、命名路由、多路由中间件、多路由、嵌套路由等功能。通过 koa-router ,可以非常灵活的定义路由。由于 koa-router 属于第三方中间件,所以在使用之前,我们需要先安装一下。在项目根目录下执行 npm 命令直接安装:
# 安装 koa-router
npm i koa-router

# 安装类型声明文件
npm i @types/koa-router -D
2
3
4
5
安装完成之后,接下来我们就可以使用 koa-router 来实现路由切换功能了。
# 4. 使用 koa-router
# 4.1 基本用法
我们可以将第 2 小节中的需求使用 koa-router 重写一下,代码如下:
import * as Koa from "koa";
// 引入 koa-router
import * as Router from "koa-router";
const app = new Koa();
// 创建路由实例对象
const router = new Router();

// 添加路由
router.get("/username", async (ctx: Koa.Context, next: Koa.Next) => {
  ctx.body = {
    username: "难凉热血",
  };
});

router.get("/age", async (ctx: Koa.Context, next: Koa.Next) => {
  ctx.body = {
    age: 18,
  };
});

/**
 * 调用路由中间件
 * 1. 调用router.routes()来组装匹配好的路由,返回一个合并好的中间件
 * 2. 调用router.allowedMethods()获得一个中间件,当发送了不符合的请求时,
 *    会返回 `405 Method Not Allowed` 或 `501 Not Implemented`
 */
app.use(router.routes()).use(router.allowedMethods());

app.listen("3000", () => {
  console.log("server is running at http://localhost:3000");
});
2
3
4
5
6
7
8
9
10
11
12
13
14
15
16
17
18
19
20
21
22
23
24
25
26
27
28
29
30
31
把上述代码复制并覆盖到 app.ts 中,然后保存并打开浏览器中分别访问 http://localhost:3000/username、http://localhost:3000/age :
可以看到和之前不使用 koa-router 的显示效果是一样的。不过使用了 koa-router 之后,代码稍微简化了一些,而且少了 if 判断,还有省略了 await next()(因为在每个路由里面都只有一个中间件需要执行,所以这里就先省略了)。
当然,除了 GET 方法,koa-router 也支持处理其他的请求方法,在任意 http 请求中,遵从 RESTful 规范,可以把 GET、POST、PUT、DELETE 类型的请求分别对应 查,增,改,删,这里 router 的方法也一一对应。如下:
import * as Koa from "koa";
// 引入 koa-router
import * as Router from "koa-router";
const app = new Koa();
// 创建路由实例对象
const router = new Router();

// 添加路由
router
  .get("/user/:id", async (ctx: Koa.Context, next: Koa.Next) => {
    // 获取用户
  })
  .post("/user", async (ctx: Koa.Context, next: Koa.Next) => {
    // 增加新用户
  })
  .put("/user/:id", async (ctx: Koa.Context, next: Koa.Next) => {
    // 修改参数 id 对应的用户
  })
  .del("/user/:id", async (ctx: Koa.Context, next: Koa.Next) => {
    // 删除参数 id 对应的用户
  });

/**
 * 调用路由中间件
 * 1. 调用router.routes()来组装匹配好的路由,返回一个合并好的中间件
 * 2. 调用router.allowedMethods()获得一个中间件,当发送了不符合的请求时,
 *    会返回 `405 Method Not Allowed` 或 `501 Not Implemented`
 */
app.use(router.routes()).use(router.allowedMethods());

app.listen("3000", () => {
  console.log("server is running at http://localhost:3000");
});
2
3
4
5
6
7
8
9
10
11
12
13
14
15
16
17
18
19
20
21
22
23
24
25
26
27
28
29
30
31
32
33
# 4.2 all 方法
路由实例 router 中还有一个all 方法。all 方法通常用于匹配一组路由或者全部路由从而做一些统一设置和处理,也可以处理不确定客户端发送的请求方法类型的情况。
假设我们要为所有请求设置跨域头,可以通过如下代码实现:
router.all("/*", async (ctx: Koa.Context, next: Koa.Next) => {
  // *代表允许来自所有域名请求
  ctx.set("Access-Control-Allow-Origin", "*");
  // 其他一些设置...
  await next();
});
2
3
4
5
6
* 号是一种通配符,表示匹配任意 URL。
另外,如果一条路由在all方法和其他方法中同时命中,只有执行了await next(),那么这条路由会在all方法和其他方法中都会起作用,举个例子,看如下代码:
import * as Koa from "koa";
// 引入 koa-router
import * as Router from "koa-router";
const app = new Koa();
// 创建路由实例对象
const router = new Router();

app.use(async (ctx: Koa.Context, next: Koa.Next) => {
  let stime = new Date().getTime(); // 当请求进来时记录一下当前时间
  console.log("请求进来了");
  await next();
  let etime = new Date().getTime(); // 当请求出去时记录一下当前时间
  console.log("请求出去了");
  console.log(`耗时:${etime - stime}ms`);
});

// 添加路由
router.get("/", async (ctx: Koa.Context, next: Koa.Next) => {
  ctx.body = {
    username: "难凉热血",
  };
  await next();
});

router.all("/", async (ctx: Koa.Context, next: Koa.Next) => {
  console.log('match "all" method');
  await next();
});

/**
 * 调用路由中间件
 * 1. 调用router.routes()来组装匹配好的路由,返回一个合并好的中间件
 * 2. 调用router.allowedMethods()获得一个中间件,当发送了不符合的请求时,
 *    会返回 `405 Method Not Allowed` 或 `501 Not Implemented`
 */
app.use(router.routes()).use(router.allowedMethods());

app.listen("3000", () => {
  console.log("server is running at http://localhost:3000");
});
2
3
4
5
6
7
8
9
10
11
12
13
14
15
16
17
18
19
20
21
22
23
24
25
26
27
28
29
30
31
32
33
34
35
36
37
38
39
40
执行这段代码,我们访问 http://localhost:3000/username 不仅能看到返回的 username 数据,也能够在控制台中看到 match "all" method' ,说明路由 / 不仅命中了 get 方法的路由,也命中了 all 方法的路由。但是,如果我们把 get 方法中的 await next() 去掉,那么就不会命中 all 方法的路由规则,也就不会执行 all 方法的回调函数了。因为说到底,对路由的处理也是一种中间件,如果不执行 await next() 把控制权交给下一个中间件,那么后面的路由就不会再执行了。
# 4.3 设置路由前缀
可以通过调用 router.prefix(prefix) 来设置路由的前缀,也可以通过实例化路由的时候传递参数设置路由的前缀,比如在 RESTful 接口里面,往往会为接口设置一个 api 前缀,如:
router.prefix("/api");

// 或者
const router = new Router({
  prefix: "/api",
});
2
3
4
5
6
设置了路由前缀后,我们就不能再像之前那样访问 http://localhost:3000/username ,应该访问 http://localhost:3000/api/username 。
# 4.4 设置多个中间件
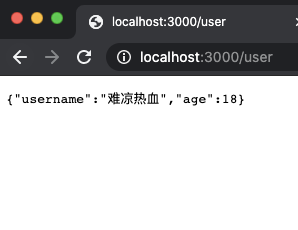
一个路由是可以设置多个回调函数的,我们把一个回调函数称作一个中间件,那么多个回调函数即为多个中间件。例如:我们想要一个 /user 接口,用于返回用户的用户名和年龄,但是用户名和年龄由于某种原因只能分开获取,所以我们需要先分别获取用户名和年龄,最后将其组装返回。代码如下:
router.get(
  "/user",
  async (ctx: Koa.Context, next: Koa.Next) => {
    const username = "难凉热血"; // 经过某些操作获取 username
    ctx.state.username = username;
    await next();
  },
  async (ctx: Koa.Context, next: Koa.Next) => {
    const age = 18; // 经过某些操作获取 age
    ctx.state.age = age;
    await next();
  },
  async (ctx: Koa.Context, next: Koa.Next) => {
    ctx.body = ctx.state;
  }
);
2
3
4
5
6
7
8
9
10
11
12
13
14
15
16
如上所示,我们先通过两个中间件分别获取到 username 和 age 并将其存入到 ctx.state 里,在第三个中间件里一并将其返回。
注意:前一个中间件在完成该做的工作后必须调用 next() 将路由控制权转交给下一个中间件,否则下一个中间件不会起作用。
# 4.5 路由参数
koa-router 也支持参数,参数会被添加到 ctx.params 中。参数可以是一个正则表达式,这个功能的实现是通过 path-to-regexp 来实现的。原理是把 URL 字符串转化成正则对象,然后再进行正则匹配,之前的例子中的 * 通配符就是一种正则表达式。
router.get("/:category/:title", function(ctx, next) {
  console.log(ctx.params);
  // => { category: 'programming', title: 'how-to-node' }
});
2
3
4
通过上面的例子可以看出,我们可以通过 ctx.params 去访问路由中的参数,使得我们能够对参数做一些处理后再执行后续的代码。