# 1. 前言
在官方axios中,还提供了一个叫做getUri的实例方法,该方法用于在不发送请求的前提下根据传入的请求配置对象返回一个请求的url,示例如下:
const config = {
  baseURL: "https://www.baidu.com/",
  url: "/user/NLRX",
  params: {
    idClient: 1,
    idTest: 2,
    testString: "thisIsATest",
  },
};
console.log(axios.getUri(config));
// https://www.baidu.com/user/NLRX?idClient=1&idTest=2&testString=thisIsATest
1
2
3
4
5
6
7
8
9
10
11
2
3
4
5
6
7
8
9
10
11
虽然该方法很少用到,但是为了完整性,我们也要为我们的axios实现该方法。
# 2. 定义 getUri 接口类型
在实现getUri方法之前,我们先在src/types/index.ts文件中的Axios接口中为该方法添加接口定义,如下:
export interface Axios {
  // 新增
  getUri: (config?: AxiosRequestConfig) => string;
}
1
2
3
4
2
3
4
# 3. 实现 getUri 方法
定义好接口后,我们就在src/core/Axios.ts文件中为Axios类添加getUri实例方法,如下:
import dispatchRequest, { transformUrl } from "./dispatchRequest";

getUri(config?: AxiosRequestConfig): string {
  config = mergeConfig(this.defaults, config);
  return transformUrl(config);
}
1
2
3
4
5
6
2
3
4
5
6
OK,getUri方法就实现好了,接下来我们就编写demo来测试下效果。
# 4. demo 编写
在 examples 目录下创建 getUri目录,在 getUri目录下创建 index.html:
<!DOCTYPE html>
<html lang="en">
  <head>
    <meta charset="UTF-8" />
    <title>getUri demo</title>
  </head>
  <body>
    <script src="/__build__/getUri.js"></script>
  </body>
</html>
1
2
3
4
5
6
7
8
9
10
2
3
4
5
6
7
8
9
10
接着再创建 app.ts 作为入口文件:
import axios from "../../src/axios";

const config = {
  baseURL: "https://www.baidu.com/",
  url: "/user/NLRX",
  params: {
    idClient: 1,
    idTest: 2,
    testString: "thisIsATest",
  },
};
console.log(axios.getUri(config));
1
2
3
4
5
6
7
8
9
10
11
12
2
3
4
5
6
7
8
9
10
11
12
本demo由于没有发送请求,故不需要在服务端添加路由接口,只需观察浏览器控制台打印结果即可。
最后在根目录下的index.html中加上启动该demo的入口:
<li><a href="examples/getUri">getUri</a></li>
1
OK,我们在命令行中执行:
# 同时开启客户端和服务端
npm run server | npm start
1
2
2
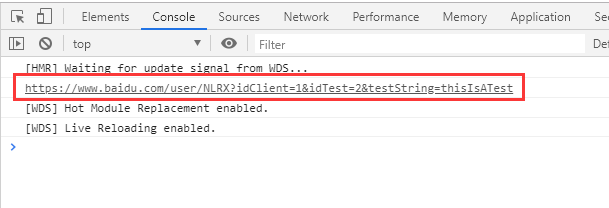
接着我们打开 chrome 浏览器,访问 http://localhost:8000/ (opens new window) 即可访问我们的 demo 了,我们点击 getUri,然后打开浏览器F12控制台,可以看到请求的url已经打印出来了。
OK,以上就是getUri方法的实现。